Archive for the ‘Plymouth Road Runner Concept Project’ Category

Road Runner Concept Chapter 17: Return from the Upholstery

October 4, 2015

thumb_RR-17_zpss2hlfqkh

The interior work is completed and the result is really impressive and was worth waiting for.

Both – the looks of the outside and the inside are quite breathtaking.

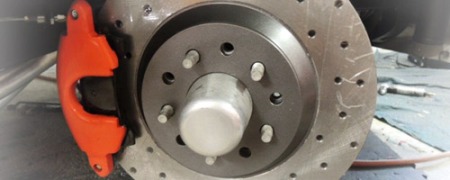
The car was pulled back home to King’s work shop. Now there are a few things need to be done until the Road Runner can hit the road: + doing all the wiring, + getting motor running, + putting in windshield and back glass.

Besides King – the two other men heavily invloved in the project are Pierre Mabile (who did all the body work and paint) and Bill Harrel (who took on the whole interior). Very well done and great work guys!

Stay tuned to get to see the finished car soon!

-> Gallery: Road Runner back from upholstery

Road Runner Concept Chapter 16: Rear Seat fabrication

August 4, 2015

thumb-interior_2_zpsbcupjmpl

The upholstery is moving along at a slow pace. The upholsterer is a real craftsman who does a lot of detail in his work.

Everything is fabricated from sheet metal and then covered with foam which was sculpted before covering it with synthetic leather.

The rear seats are similar in design to the front bucket seats and are entirely handmade.

-> Gallery: Rear Seat fabrication

Road Runner Concept Chapter 15: Interior in progress

January 20, 2015

thumb-interior_zpsf4d99de6

King comissioned Bill Harrel to do the interior. Bill’s work is usually work of art. Besides executing the interior design concept, Bill brings a lot of own ideas for the interior.

The dash board and center console are already in dark brown vinyl leather with orange accent stitching. The area around the shifter will house window and seat heater switches.

The back seats are getting a complete redesign. The work in progress already shows that the finished interior will be spectacular.

-> Gallery: Interior progress

Road Runner Concept Chapter 14: Body assembly

July 14, 2014

thumbRR080714_zpsffe4ad12

King and Pierre worked a lot and assembled the body during the past weeks. Some quick pics show the progress.

From the outside the Road Runner looks almost finished. The body lines look smooth and clean.

As a next step the car will be moved to the upholsterer.

-> Gallery: Body almost finished

Painting Strobe Stripes – Road Runner Concept – Chapter 13

May 17, 2014

thumbstrobestripes_zpsd5b1177b

Last week the Road Runner got the characteristic Strobe Stripes painted.

The process started by masking the stripes layout. A Road Runner character was added to match the concept drawings. Dark brown metallic paint was sprayed on to the roof. A couple of days later masking tapes were removed. And the result is very pleasing.

The next step is color standing to give the paint surface smooth and high shine.

-> Gallery: Painting Strobe Stripes

Interior Design – Road Runner Concept – Chapter 12

April 1, 2014

thumbinterior_zpsf935e498

The body/exterior of the Road Runner is now quite far in the process. Time to pay attention to the interior design!

Fresh components from aftermarket and donor items from several cars will be picked to create a modern-day looking interior. The seats come from a Chrysler Crossfire while the center console is taken from a Nissan 350 Z. All covered in black and light grey leather.
Push Button Ignition and other electronic features complement the interior layout.

In the next step the mentioned interior elements will be installed and the design layout sent to the upholsterer.

-> Gallery: Interior Design

Instruments – Road Runner Concept – Chapter 11

March 7, 2014

gaugesthumb_zps98895dbb

The Road Runner gets special instruments.

At first a Layout/Design was made with the characteristic Road Runner Head being integrated with the Speedometer and REV Counter. The design was sent to Speedhut. These people are specialized in custom gauges and made the dials according to the layout.

-> Gallery: Instruments

Disc Brakes – Road Runner Concept – Chapter 10

March 29, 2013

Disc-Brake_zps72156e94

A Road Runner not only wants to run fast but also needs to brake that way, if necessary – and this can be done via a convenient Disc Brake System.

At first, King Hardeman intended to go with 11” Disc Brakes. But he quickly experienced that 11” rotors look very small. And that therefore, 13” discs would be the right choice. The Calipers were grinded smoothly and powder coated in body color.

As a result, the Brake System perfectly stuffs these one-off Boyd Coddington 19” Wheels (on the front axle) now.

-> Gallery: Brake System

Creating an Illuminated Road Runner Head Logo – Chapter 9

December 19, 2012

The Road Runner Concept designs call for an illuminated Road Runner head at the front – behind the smoked cover/grille. The implementation was quite a challenge but King Hardeman managed it!

Road-Runner-LED-Light

King started with a thick (15 mm) piece of oval shaped clear acrylic. The back was sprayed flat black and then the Road Runner head was deeply etched on it. Further a frame and body for the unit was created with blue LED lights integrated.

After some fine-tuning on shape and function the Road Runner Head is now ready to do it’s work behind the smoked glass/grille.

-> Gallery: Illuminated Road Runner Logo

Fabricated Honeycomb Grille – Road Runner Concept Update – Chapter 8

June 26, 2012

RR-Lower-Grille

King Hardeman wanted the lower front grille insert to look like in the concept drawings with the honeycomb design.

Creating one-off parts can be quite expensive and for projects like this some invention is needed and can save some money.
One day when King went to the shopping mall a simple shopping cart with a basket out of honeycomb mesh gave him inspiration.

So he searched the web and contacted a company that sells shopping baskets. It took some time to get them to agree to sell what he wanted. The first basket sides he received were too small. It took more E-mails to get the shopping cart company to send sides from a larger basket.

With the correct honeycomb base material in hands King now fabricated a frame to fit the lower grille opening and then cut the basket sides to fit. The outcome looks very good and proves that inventive talent pays off.

-> Gallery: Honeycomb Grille